Gluten Free Baked Pumpkin Donuts Easy Fall Treat
Baked Pumpkin Donuts – Gluten Free are more than just a treat; they’re a comforting embrace in every bite. As the crisp autumn air begins to settle, there’s a certain magic that awakens, and for me, that magic is inextricably linked to the warm, spiced aroma of pumpkin. These aren’t your average, dense gluten-free baked goods. We’re talking about donuts that are wonderfully tender, moist, and bursting with that quintessential fall flavor we all crave. Whether you’re navigating a gluten-free lifestyle by necessity or by choice, you shouldn’t have to miss out on the simple joy of a freshly baked donut. That’s precisely why I’m so excited to share this recipe for Baked Pumpkin Donuts – Gluten Free with you. They’re incredibly easy to whip up, making them perfect for a weekend brunch, an after-school snack, or even a guilt-free indulgence any time of day. Get ready to fall in love with fall all over again!
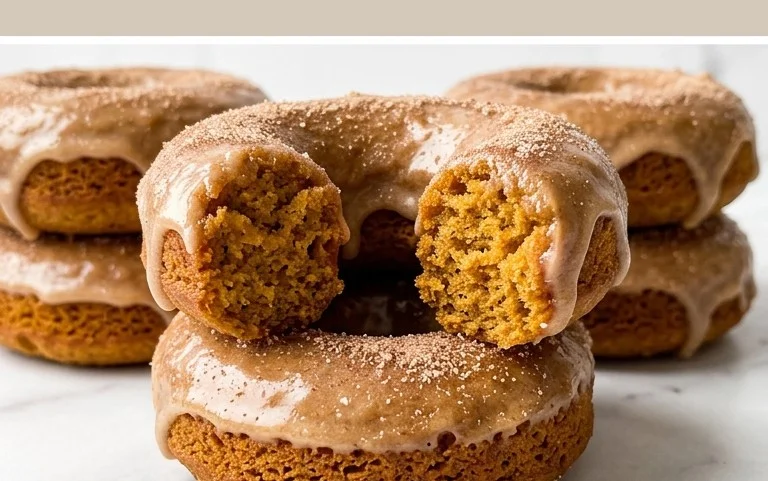
Gluten-Free Baked Pumpkin Donuts
Fall is officially here, and with it comes the irresistible aroma of pumpkin spice! While I love a good pumpkin pie, sometimes I crave something a little more portable and a lot more fun. Enter these delicious gluten-free baked pumpkin donuts. They’re moist, perfectly spiced, and incredibly easy to make, making them a fantastic treat for breakfast, a snack, or even dessert. Forget the deep fryer; these are baked to golden perfection, making them a slightly healthier indulgence that everyone can enjoy, especially those with gluten sensitivities. The beauty of baking donuts is that you can control the ingredients and avoid the mess and fuss of frying. Plus, the donut pan does most of the heavy lifting for you!
These donuts are wonderfully tender thanks to the pumpkin puree and the combination of gluten-free flours. The spices are perfectly balanced to give you that classic fall flavor without being overpowering. And the simple cinnamon-sugar coating? It’s the perfect finishing touch, adding a delightful sweet crunch. I’ve found that using room temperature eggs really helps the batter emulsify smoothly, leading to a more uniform texture in the finished donuts. Don’t skip this step if you can help it!
Ingredients:
- 1.5 cups canned pumpkin puree – not pumpkin pie filling
- 4 large eggs – at room temperature
- 1/4 cup melted coconut oil
- 1.5 cups granulated sugar
- 1.5 teaspoons baking powder
- 1.5 teaspoons pumpkin pie spice
- 1/2 teaspoon ground cinnamon
- 1/4 teaspoon ground nutmeg
- 1/4 teaspoon salt
- 1 + 3/4 cup gluten-free all-purpose flour
- 1/2 teaspoon cornstarch
- 1 cup granulated sugar
- 1/4 cup ground cinnamon
- Melted butter – optional
Cooking Instructions:
Step 1: Prepare the Donut Pans and Preheat the Oven
The very first thing you’ll want to do is get your donut pans ready. Since these are baked, they can sometimes stick a little if not greased properly. I like to use a good quality non-stick cooking spray or brush each cavity generously with melted butter or coconut oil. Make sure to get into all the nooks and crannies. Once your pans are prepped, preheat your oven to 350 degrees Fahrenheit (175 degrees Celsius). Having the oven at the correct temperature when the batter is ready is crucial for even baking and a good rise.
Step 2: Mix the Wet Ingredients and Pumpkin
In a large mixing bowl, combine the canned pumpkin puree, room temperature large eggs, and melted coconut oil. Whisk these ingredients together until they are thoroughly combined and smooth. It’s important that the eggs are at room temperature because they will incorporate more easily into the batter, creating a smoother, more consistent mixture. If your eggs are cold, you can quickly warm them by placing them in a bowl of warm water for about 5-10 minutes. This step forms the base of our moist and flavorful donut batter.
Step 3: Add Dry Ingredients to the Wet Mixture
To the wet ingredients, add 1.5 cups of granulated sugar, baking powder, pumpkin pie spice, 1/2 teaspoon ground cinnamon, ground nutmeg, and salt. Stir these in until just combined. Be careful not to overmix at this stage. Overmixing can develop the gluten in gluten-free flours too much (even though it’s a blend, overworking can still impact texture) or result in a tougher donut. The goal is a cohesive, well-mixed batter.
Step 4: Incorporate the Gluten-Free Flour and Cornstarch
Now it’s time to add the dry ingredients that will give our donuts their structure. In a separate medium bowl, whisk together the gluten-free all-purpose flour and cornstarch. The cornstarch helps to lighten the texture of the gluten-free flour blend, making the donuts even more tender. Gradually add this flour mixture to the wet ingredients, mixing until *just* combined. Again, avoid overmixing. You should have a thick, but pourable batter. If the batter seems a little too thick, you can add a tablespoon of milk (dairy or non-dairy) at a time until you reach the desired consistency.
Step 5: Fill the Donut Pans and Bake
Carefully spoon or pipe the batter into your prepared donut pans, filling each cavity about two-thirds to three-quarters full. Overfilling can cause the donuts to spread out and lose their shape. I find a piping bag or a large Ziploc bag with the corner snipped off makes this process much cleaner and more precise. Place the filled donut pans into your preheated oven. Bake for 18-22 minutes, or until a toothpick inserted into the center of a donut comes out clean. The exact baking time will depend on your oven and the size of your donut cavities. Keep an eye on them during the last few minutes to prevent over-baking, which can lead to dry donuts.
Step 6: Prepare the Cinnamon-Sugar Coating and Glaze
While your donuts are baking, prepare your delicious cinnamon-sugar coating. In a shallow bowl or plate, combine 1 cup of granulated sugar and 1/4 cup of ground cinnamon. Stir well to ensure the cinnamon is evenly distributed throughout the sugar. This will be our beautiful, crunchy topping. For an extra touch of richness, you can melt some butter in a small bowl. This melted butter will help the cinnamon-sugar adhere to the warm donuts.
Step 7: Coat the Baked Donuts
Once the donuts are baked and have had a few minutes to cool in the pans (about 5 minutes is usually sufficient), carefully invert them onto a wire rack to cool completely. While they are still warm, but not hot, you can dip each donut into the melted butter (if using) to coat the surface lightly. Then, generously dredge each donut in the cinnamon-sugar mixture, making sure to coat all sides. The warmth of the donut will help the coating stick. If you prefer a glaze, you can mix powdered sugar with a little milk or pumpkin juice until you reach your desired consistency and drizzle it over the cooled donuts.
Enjoy your warm, spiced, and perfectly tender gluten-free baked pumpkin donuts! They are best enjoyed fresh, but can be stored in an airtight container at room temperature for a day or two. Happy baking!
Conclusion:
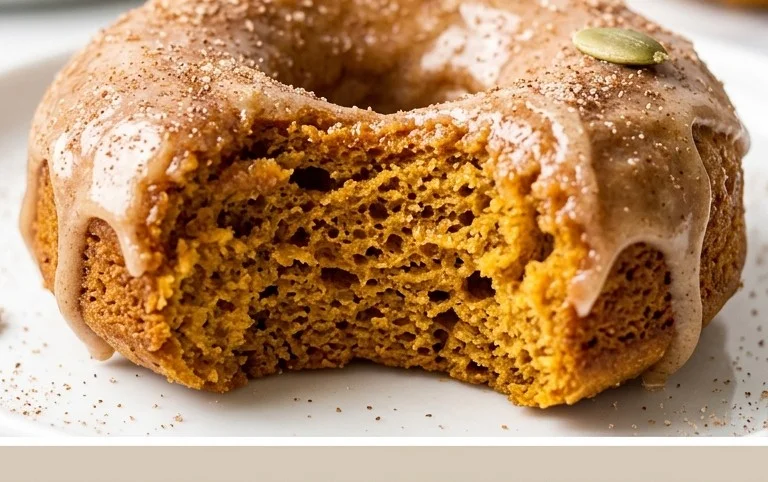
I hope you’ve enjoyed diving into this delicious Baked Pumpkin Donut recipe! These gluten-free delights are a fantastic way to capture the cozy flavors of fall without any of the gluten. They’re surprisingly light, perfectly spiced, and so much healthier than their fried counterparts, making them a guilt-free treat for any occasion. The ease of baking means you can whip up a batch even on a busy weeknight!
These baked pumpkin donuts are incredibly versatile. Enjoy them warm for breakfast with a cup of coffee, as a delightful afternoon snack, or even as a sweet ending to a meal. For an extra festive touch, consider a simple glaze made with powdered sugar and a splash of milk or maple syrup. If you’re feeling adventurous, try adding a sprinkle of cinnamon sugar, a drizzle of chocolate ganache, or even some chopped pecans for added crunch and flavor. Don’t be afraid to experiment and make these your own! I truly encourage you to give these baked pumpkin donuts a try – I’m confident you’ll fall in love with them!
Frequently Asked Questions:
Can I make these donuts ahead of time?
Yes, absolutely! Baked pumpkin donuts store well at room temperature in an airtight container for up to 2-3 days. For longer storage, you can refrigerate them for up to a week. They are best enjoyed at room temperature, so just let them sit out for a bit before serving.
What kind of gluten-free flour blend works best?
I’ve had great success with a good quality all-purpose gluten-free flour blend that contains xanthan gum. If your blend doesn’t include it, you might want to add about half a teaspoon to ensure proper texture and binding in your baked pumpkin donuts.
Can I substitute the pumpkin puree?
While pumpkin puree is key to the flavor and moisture, you could experiment with other winter squash purees like butternut squash or sweet potato for a slightly different, yet still delicious, flavor profile. The texture might vary slightly.
Baked Pumpkin Donuts – Gluten Free
Delicious and easy gluten-free baked pumpkin donuts, perfect for a fall treat.
Ingredients
-
1.5 cups canned pumpkin puree – not pumpkin pie filling
-
4 large eggs – at room temperature
-
1/4 cup melted coconut oil
-
1.5 cups granulated sugar
-
1.5 teaspoons baking powder
-
1.5 teaspoons pumpkin pie spice
-
1/2 teaspoon ground cinnamon
-
1/4 teaspoon ground nutmeg
-
1/4 teaspoon salt
-
1 + 3/4 cup gluten-free all-purpose flour
-
1/2 teaspoon cornstarch
-
1 cup granulated sugar
-
1/4 cup ground cinnamon
-
Melted butter – optional
Instructions
-
Step 1
Preheat oven to 350°F (175°C). Grease and flour a donut pan, or line with parchment paper. -
Step 2
In a large bowl, whisk together the pumpkin puree, eggs, and melted coconut oil until well combined. -
Step 3
In a separate bowl, whisk together the granulated sugar, baking powder, pumpkin pie spice, cinnamon, nutmeg, and salt. -
Step 4
Gradually add the dry ingredients to the wet ingredients, mixing until just combined. Be careful not to overmix. -
Step 5
In a small bowl, combine the gluten-free all-purpose flour and cornstarch. Add this to the batter and mix until smooth. -
Step 6
Spoon or pipe the batter into the prepared donut pan, filling each cavity about two-thirds full. -
Step 7
Bake for 12-15 minutes, or until a toothpick inserted into the center comes out clean. -
Step 8
Let the donuts cool in the pan for a few minutes before transferring them to a wire rack to cool completely. -
Step 9
For the topping, in a shallow dish, combine the 1 cup granulated sugar and 1/4 cup ground cinnamon. If desired, dip the cooled donuts in melted butter before coating them in the cinnamon sugar mixture.
Important Information
Nutrition Facts (Per Serving)
It is important to consider this information as approximate and not to use it as definitive health advice.
Allergy Information
Please check ingredients for potential allergens and consult a health professional if in doubt.