Easy Homemade Fruit Snacks Recipe-Kid Friendly
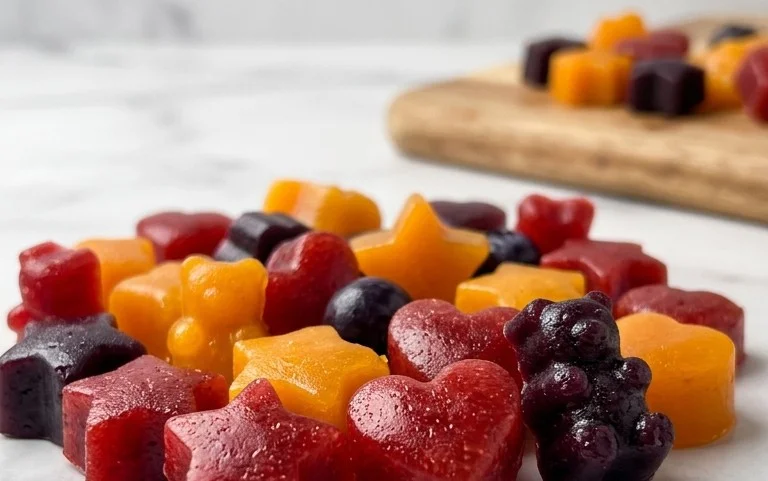
Homemade fruit snacks are a delightful way to enjoy a burst of natural sweetness without any of the artificial nasties. If you’ve ever found yourself reaching for those brightly colored store-bought versions, dreaming of a healthier alternative, then you’re in the right place! We all love the chewy texture and vibrant fruit flavors that make fruit snacks so irresistible, especially for little ones. But the real magic of making your own homemade fruit snacks lies in the control you have over the ingredients. Imagine crafting your own unique flavor combinations, packing them with real fruit purees, and skipping the corn syrup and artificial colors. These aren’t just snacks; they’re little bites of sunshine, guilt-free and bursting with pure, unadulterated fruit goodness. Get ready to ditch the processed aisle and embrace the joy of creating your own delicious, wholesome treats!
Homemade Fruit Snacks Recipe
Are you tired of store-bought fruit snacks filled with artificial flavors, colors, and a lot of sugar? I know I was! That’s why I decided to create my own, and let me tell you, the results are fantastic. These homemade fruit snacks are not only delicious and packed with natural goodness, but they’re also incredibly easy to make. You can customize them with your favorite fruits and even sneak in some hidden veggies for an extra nutritional boost. Plus, the texture is spot-on – chewy, fruity, and satisfying. It feels so good knowing exactly what’s going into my body and what I’m feeding my family. Let’s dive into how we can make these vibrant and healthy treats together.
Ingredients:
Cooking Instructions
Now for the fun part – transforming these wholesome ingredients into delightful fruit snacks! Don’t be intimidated by the vegetable additions; they blend in surprisingly well and contribute to the vibrant colors.
Step 1: Prepare the Fruit and Vegetable Purée
First, we need to get our fruits and vegetables ready to blend. In a blender or food processor, combine all your chopped fruits (green grapes, strawberries, peaches, blueberries) and your chopped vegetables (spinach, beets, carrots, zucchini). If you’re using harder vegetables like carrots or beets, you might want to steam or boil them for a few minutes to soften them slightly, which will make blending easier and create a smoother purée. This will help break down the fibers and allow for a smoother texture in your final fruit snacks. Aim for a consistency that is as smooth as possible – no one wants chunky fruit snacks!
Step 2: Heat and Blend the Purée
Once you have your fruit and vegetable mixture in the blender, it’s time to add the liquid. Pour in your ¼ to ½ cup of pure apple juice. Start with ¼ cup and add more if needed to achieve your desired consistency. Add the raw honey and the pure vanilla extract. Now, blend everything together until you have a completely smooth purée. You want to make sure there are no large chunks of fruit or vegetables remaining. Taste the purée at this stage and adjust sweetness if necessary. Remember, the gelatin will slightly mute the flavors, so a slightly sweeter purée is often ideal.
Step 3: Bloom the Gelatin
In a separate small bowl, we’re going to “bloom” the gelatin. This process helps the gelatin dissolve smoothly without clumping. Pour about 2-3 tablespoons of cold water (or a little extra apple juice if you have it) into the bowl. Sprinkle the 3 tablespoons of gelatin evenly over the surface of the water. Let it sit undisturbed for about 5-10 minutes. You’ll notice the gelatin will absorb the liquid and become thick and jelly-like. This is exactly what we want. Don’t rush this step, as properly bloomed gelatin is key to smooth fruit snacks.
Step 4: Combine and Heat the Mixture
Now, pour your smooth fruit and vegetable purée into a small saucepan. Add the bloomed gelatin mixture to the saucepan. Place the saucepan over low to medium heat. Stir continuously with a whisk. You want to heat the mixture gently until the gelatin is completely dissolved and the purée is warmed through. Do NOT boil the mixture, as excessive heat can degrade the gelatin and affect its gelling properties. You should see the gelatin strands disappear into the liquid. Keep stirring until you have a smooth, homogenous liquid. This usually takes about 5-8 minutes.
Step 5: Pour and Chill
Once the gelatin is fully dissolved and the mixture is smooth and warm, it’s time to pour. You can pour the liquid into silicone molds (like gummy bear molds or small squares) or a parchment-lined shallow baking dish. If you’re using a baking dish, you’ll cut them into squares later. Gently tap the molds or dish on the counter a few times to release any air bubbles. Let the molds cool at room temperature for about 30 minutes, then transfer them to the refrigerator. Allow them to chill for at least 2-4 hours, or until they are completely set and firm to the touch. Once they’re firm, you can carefully pop them out of the molds. If you used a baking dish, gently lift the parchment paper and cut the set mixture into your desired snack shapes using a sharp knife or a pizza cutter. Store your homemade fruit snacks in an airtight container in the refrigerator. They are best enjoyed within a week or two. Enjoy your healthy, homemade goodness!
Conclusion:
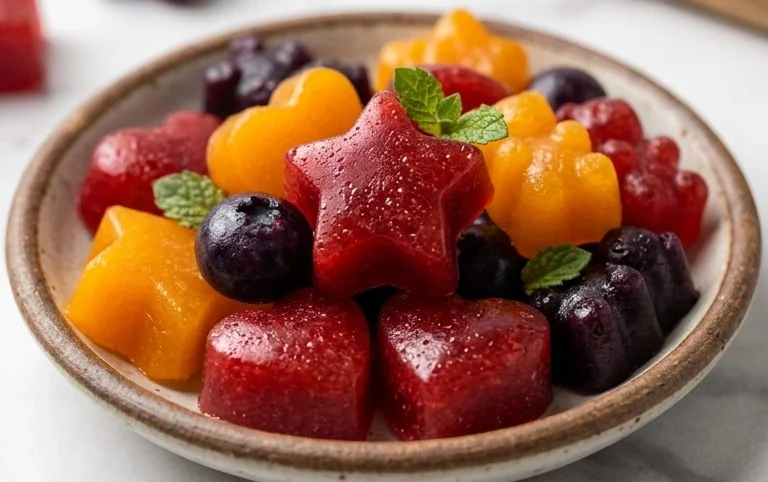
You’ve now got the knowledge to create delicious and healthy homemade fruit snacks right in your own kitchen! This recipe is fantastic because it allows you complete control over the ingredients, ditching the artificial flavors, colors, and excessive sugar often found in store-bought versions. Imagine the satisfaction of knowing exactly what goes into your family’s favorite chewy treats. These vibrant, naturally sweet fruit snacks are perfect for lunchboxes, after-school pick-me-ups, or even a fun activity to make with kids. Get creative with your fruit choices – berries, mangoes, peaches, and pineapple all lend themselves beautifully to this recipe. You can also experiment with adding a touch of honey or maple syrup for extra sweetness, or even a sprinkle of chia seeds for added texture and nutrients. Don’t be afraid to try different flavor combinations; the possibilities are endless! I truly encourage you to give this homemade fruit snacks recipe a try. You’ll be amazed at how easy and rewarding it is to whip up these wholesome delights!
Frequently Asked Questions:
What fruits work best for homemade fruit snacks?
Most fruits that are naturally sweet and have a good amount of pectin will work well. Berries like strawberries and raspberries, stone fruits like peaches and apricots, tropical fruits like mango and pineapple, and even apples and pears are excellent choices. Blending two or three fruits together can create wonderfully complex flavors.
Can I make these fruit snacks without added sugar?
Absolutely! The sweetness of the fruit itself is often sufficient. If you prefer a sweeter snack, you can add a small amount of natural sweetener like honey, maple syrup, or agave nectar. Start with a little and taste as you go.
How long do these homemade fruit snacks last?
When stored properly in an airtight container in the refrigerator, your homemade fruit snacks should stay fresh for about 1-2 weeks. Ensure they are fully cooled before storing to prevent condensation, which can affect their texture.
Homemade Fruit Snacks
Nutritious and delicious homemade fruit snacks made with real fruit and vegetables. A healthy alternative to store-bought gummies.
Ingredients
-
1 cup strawberries diced
-
1 cup green grapes
-
1 cup peaches (chopped)
-
1 cup blueberries
-
¼ cup spinach
-
¼ cup beets
-
¼ cup carrots
-
¼ cup zucchini
-
¼ cup pure apple juice (no added sugar)
-
2 Tablespoons raw honey
-
¼ teaspoon pure vanilla extract
-
3 Tablespoons gelatin (preferably collagen, grass-fed)
Instructions
-
Step 1
Combine all chopped fruits and vegetables in a blender or food processor. -
Step 2
Add the pure apple juice, raw honey, and pure vanilla extract. Blend until completely smooth. -
Step 3
Pour the blended mixture into a saucepan. Sprinkle the gelatin over the surface and let it sit for 1-2 minutes to bloom. -
Step 4
Gently heat the mixture over low heat, whisking constantly, until the gelatin is completely dissolved. Do not boil. -
Step 5
Pour the mixture into silicone molds (gummy bear shapes, fruit shapes, or small squares work well). -
Step 6
Refrigerate for at least 1-2 hours, or until firm and set. -
Step 7
Once firm, carefully remove the fruit snacks from the molds. Store in an airtight container in the refrigerator.
Important Information
Nutrition Facts (Per Serving)
It is important to consider this information as approximate and not to use it as definitive health advice.
Allergy Information
Please check ingredients for potential allergens and consult a health professional if in doubt.